
Perfume photography is an art where every detail is important: light, background, composition, angle. Perfume is a product that cannot be conveyed directly through photography, but you can visually create an atmosphere that evokes associations with the aroma.
How to take a picture of a bottle so that it looks elegant, expensive and reflects the character of the perfume ? In this article, we will analyze the main techniques for photographing perfume – from preparation to post-processing.
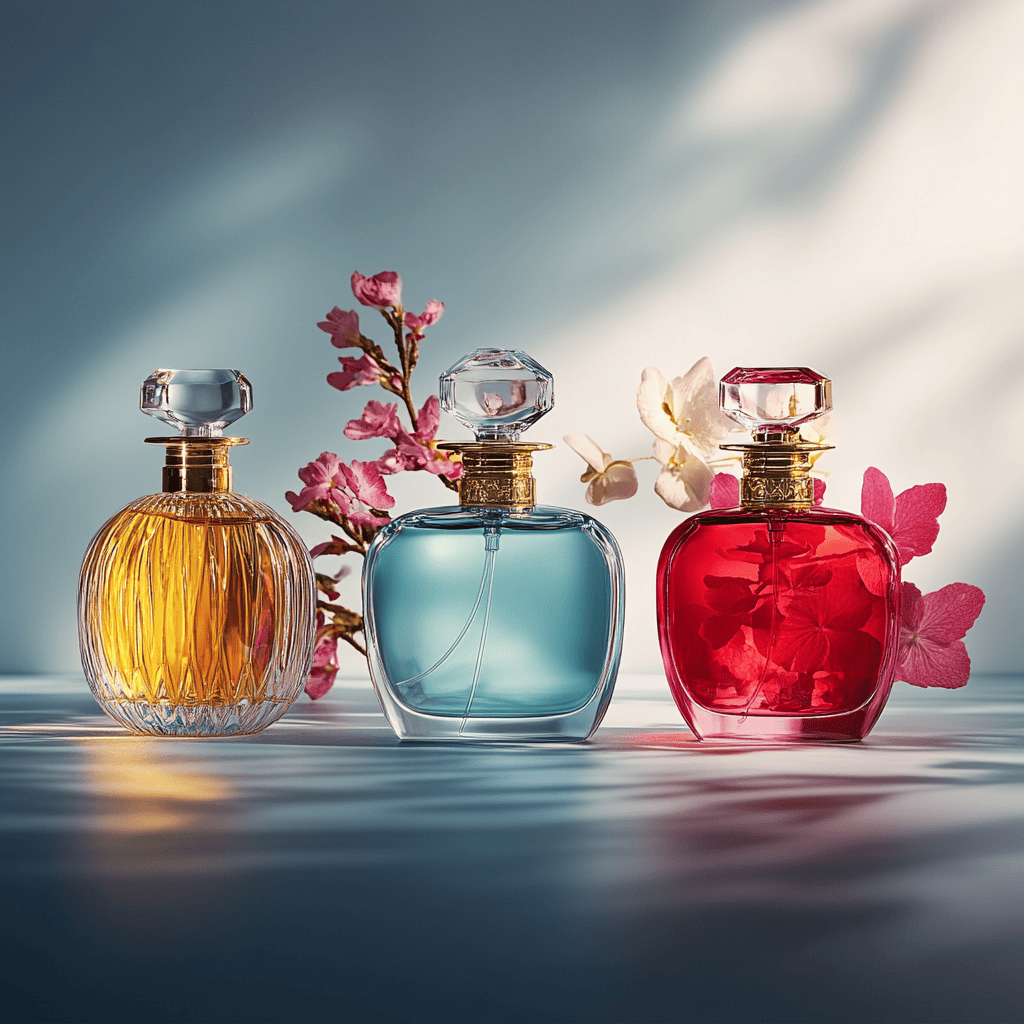
Preparing for the shoot: choosing a concept and background
Before you start shooting, it is important to decide on the concept. What style and mood should the photo convey? This affects the choice of background, lighting and additional elements.
How to define a concept?
● The aroma and its character – light and fresh compositions look better on a light background, and warm and oriental ones – on a dark and rich one.
● Target audience : youth fragrances can be designed in a dynamic style, and luxury fragrances in a minimalist style.
● Brand history – the shooting style should correspond to the corporate style of the perfume house.
Which background is better to choose?
● Minimalism – monochromatic surfaces (black, white, grey, pastel shades).
● Textures – marble, wood, glass, metal, velvet add depth and luxury.
● Natural elements – flowers, water, smoke, sand – create an atmosphere and associations with aromatic notes.
Choosing a background is the first step to creating the perfect shot.
Working with light: the key factor for a successful shot
Lighting plays a major role in perfume photography, as glass and liquid reflect light, creating glare and unwanted reflections.
What types of light are best for photographing perfume?
● Soft diffused light – creates delicate reflections, suitable for elegant and sophisticated compositions.
● Backlight (from behind) – emphasizes the transparency of the glass and gives the photo depth.
● Directional side light – makes textures more expressive and adds dynamics.
How to avoid unwanted reflections?
● Use diffusers or soft boxes to diffuse the light.
● Work with the shooting angle to avoid glare on the glass.
● Use polarizing filters if shooting with natural light.
The play of light and shadow helps to give the photo volume and make the bottle more expressive.
Composition and arrangement of the bottle
A well-built composition makes the frame interesting and harmonious. It is important to consider the balance, the shape of the bottle and additional elements.
Basic principles of composition:
● Rule of thirds – placing the bottle at the intersection of imaginary grid lines makes the photo balanced.
● Symmetry and centering – suitable for strict, elegant shots.
● Diagonal lines add dynamics and make the frame more expressive.
Additional elements that enhance the image:
● Floral arrangements – suitable for floral scents, add romance.
● Metal and glass elements create a premium effect.
● Fabrics and textures – velvet, silk, leather – highlight the character of the fragrance.
A good composition makes a photo not just beautiful, but emotionally charged.
Effects to create atmosphere in the frame
To convey the sensation of aroma, special visual effects can be used.
Which effects work best?
● Smoke and steam create a feeling of warmth, mystery, and airiness.
● Glare and reflections emphasize the shape of the bottle and make the frame more voluminous.
● Drops of water or oil create the effect of freshness and purity.
How to add these effects to the frame?
● Use ice vapor (frozen carbon dioxide) or a vape to create a haze.
● Add soft highlights in the background using flashlights or candles.
● Spray water or oil on the glass surface before shooting.
These details help to visually convey the character of the aroma, making the photo atmospheric.
Post-processing: the final touch for the perfect shot
After shooting, it is important to process the photo correctly, removing excess glare, enhancing color depth and emphasizing textures.
Post-processing stages:
- Correction of light and contrast – adding volume and highlighting the bottle.
- Removing glare and unwanted reflections – using the Clone Stamp tool in Photoshop.
- Working with colors – enhancing dominant shades, creating the desired mood.
- Adding a soft glow – for a light and airy effect.
- Final retouching – removing minor defects, emphasizing textures.
The best programs for processing:
● Adobe Photoshop – for professional retouching and detail correction.
● Adobe Lightroom – for color correction and working with shadows.
● Snapseed is a convenient mobile editor for express processing.
Post-processing should enhance the beauty of the photo, but not make it overly artificial.
Spirit photography is not just a technical process, but a real art that requires attention to detail, play of light and composition. To create the perfect shot, it is important:
● Define the concept and choose a suitable background.
● Use proper lighting, avoiding unnecessary glare.
● Think about the composition and location of the bottle.
● Add visual effects that enhance the atmosphere of the photo.
● Do high-quality post-processing for the final touch.
By following these rules, you can take spectacular and stylish photographs of perfume that convey not only the appearance of the bottle, but also the character of the aroma.
Questions and Answers
It is best to use soft diffused light or backlight to emphasize the transparency of the glass and create volume.
Smoke, water drops, flowers, mirror surfaces – all this helps to visually “feel” the smell.
Use diffusers to scatter light, choose the right shooting angle and use polarizing filters.